
How Can I Install a Conference Room Camera Myself
You can install a conference room camera yourself if you choose a USB plug-and-play model, have basic computer skills, and can mount the camera at the correct height and distance. Most USB conference cameras require no technical expertise beyond connecting a cable and adjusting positioning.
What You Need Before Starting
Required items:
- conference camera
- Computer or conferencing device with USB port
- Laptop or phone for testing
- Cable management clips (optional)
Recommended tools for mounting:
- Screwdriver (if wall mounting)
- Level tool or smartphone level app
- Pencil for marking mounting points
- Drill (only if mounting to wall, not needed for monitor/tripod mounts)
Time required
2-3 minutes for easiest set-up, 15-30 minutes for basic setup, 45-60 minutes with wall mounting.
What are the two Types of Conference Room Cameras
Conference room cameras fall into two main categories, each with different installation requirements and where you can install it yourself.
Traditional Directional Cameras
Traditional cameras capture video in one direction with field of view ranging from 90-180 degrees. These cameras are mounted on walls, monitors, TV or tripods facing participants seated in front of them.
Modern 360-Degree Cameras
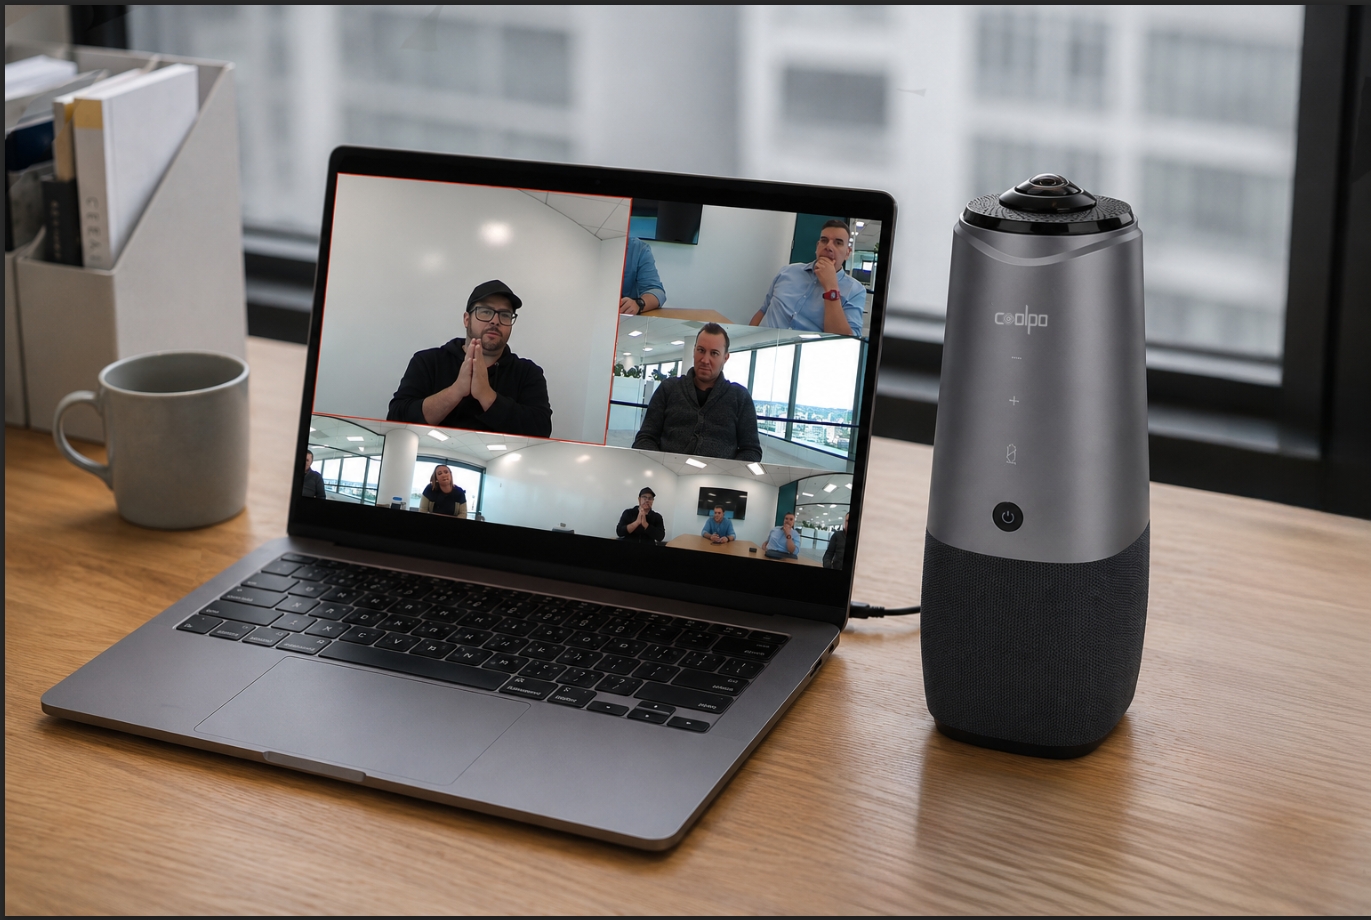
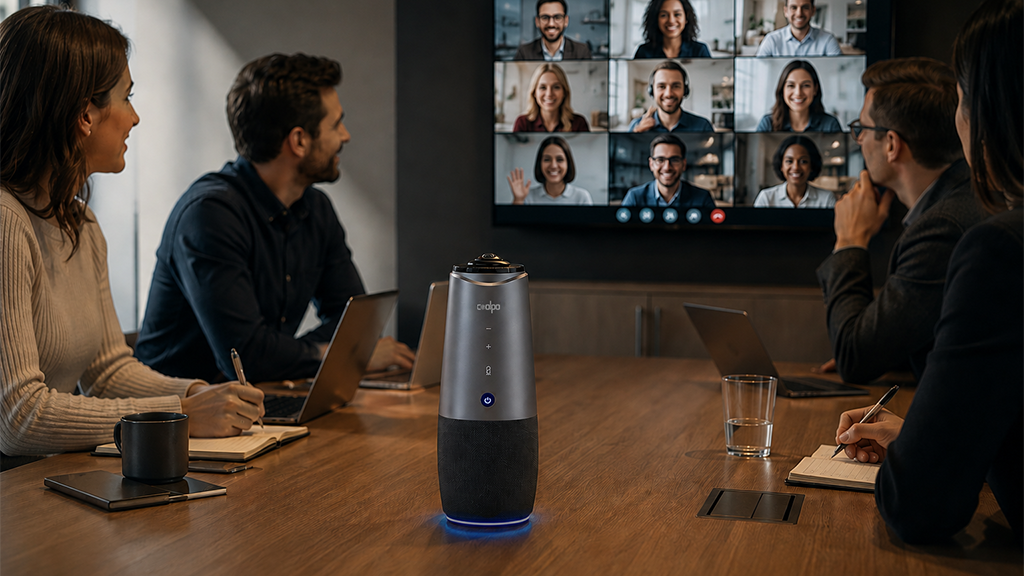
360-degree conference room camera like the Coolpo AI Huddle Pana capture video in all directions simultaneously, eliminating blind spots for participants seated around a table. These cameras sit directly on the conference table at the center and depending on its features, you can make adjustments to its field of view.
How to install a conference room camera
Step 1: Choose Camera Position
Measure your conference room to determine optimal camera placement. Position camera at eye level (4-6 feet from floor) and 6-12 feet from where participants will sit.
Distance formula:
- For 120-degree lens: room width × 1.5 = camera distance
- For 150-degree lens: room width × 1.0 = camera distance
- For 360-degree lens: place the camera at table center or in front of you depending on your conference room setup
Center the camera, so equal distance exists from leftmost to rightmost participants. Mark the spot with pencil before mounting.
Step 2: Select Mounting Method
USB conference room cameras offer multiple mounting options:
Table Mount (easiest)
Modern conference cameras are designed for easy use as easily as placing them on top of the table without intricate mounting.
Monitor clip mount (second easiest)
Clips onto top of TV or monitor. No tools required. Weight limit typically 2-3 pounds. Works for screens 0.5-2 inches thick.
Tripod mount (most flexible)
Places camera on table or shelf. Allows easy repositioning. Standard ¼-inch tripod thread fits most cameras. Height adjustable.
Wall mount (most permanent)
Requires drilling. Provides cleanest look. Ensure wall mount rated for camera weight. Locate wall studs for secure attachment.
Step 3: Connect USB Cable & Power Cable
Plug USB cable (and power cable) into camera first, then into computer.
Cable length considerations:
- Standard cables: 6-10 feet
- Extended USB cables available up to 16 feet
- Beyond 16 feet, use powered USB extenders to prevent signal loss
- Route cables along walls or under tables for clean appearance
Most computers automatically detect USB cameras within 10-15 seconds. Check device manager (Windows) or system preferences (Mac) to verify recognition.
Step 4: Install Any Required Software
Most USB cameras work immediately without drivers. Some cameras include optional software for:
- Firmware updates
- Advanced settings (exposure, white balance)
- Camera presets for different room layouts
Download software only from manufacturer's official website. Check current firmware version and update if needed before first use.
Step 5: Test Camera in Conferencing Platform
Open your primary video conferencing platform (Zoom, Microsoft Teams, Google Meet) and select the camera:
Zoom: Settings > Video > Camera dropdown
Microsoft Teams: Settings > Devices > Camera dropdown
Google Meet: Settings (gear icon) > Video > Camera dropdown
Verify image appears clearly and all participants fit in the frame. Check these elements:
- All seated positions visible
- Faces clear and in focus
- Lighting adequate (no backlit silhouettes)
- No distracting background elements in frame
Step 6: Adjust Camera Settings
Position camera angle by tilting up or down slightly. Most USB cameras auto-adjust focus, exposure, and white balance. If the image appears too dark or bright, adjust room lighting rather than camera settings.
Field of view check: Have participants sit in furthest positions. Verify faces remain clearly visible and frame includes all seats with small margins on sides.
Audio test: If the camera has built-in microphones, test audio pickup at furthest seat position. Speak at normal volume and verify clarity in recording or live call.
Step 7: Secure Cables
Use adhesive cable clips along walls or table edges to prevent tripping hazards. Leave slight slack near camera connection to prevent stress on ports if cable gets pulled.
For wall-mounted cameras, run cables through cable raceways or behind walls if building codes permit. Consult building management before drilling through walls.
Common Installation Issues
Here are some common issues you might encounter during installation:
- Camera not detected: Try different USB ports. Restart computer with camera connected. Check cable connections are secure.
- Poor image quality: Clean camera lens with microfiber cloth. Check room lighting. Verify camera positioned at the correct distance.
- Frame cuts off participants: Move camera farther back or switch to wider-angle lens model. Verify the field of view matches room size.
- Unstable mounting: Ensure monitor clip properly secured. For tripods, extend legs fully for stability. Wall mounts require anchors in drywall or mounting for studs.
Frequently Asked Questions
1. Can I really install a conference room camera myself without professional help?
Yes. Most USB plug-and-play conference room cameras require no technical expertise. If you can connect a USB cable and position a device at eye level, you can install a conference room camera yourself in 15–30 minutes.
2. Do I need to drill holes in the wall to install a conference room camera?
Not necessarily. Many conference cameras offer table-top placement, monitor clip mounts, or tripod mounts — none of which require drilling. Wall mounting is optional and only needed if you want a permanent, flush installation.
3. Will the camera work immediately after I plug it in?
Most USB conference room cameras are plug-and-play, meaning they work immediately without driver installation. Simply connect the USB cable to your computer, open your video conferencing platform (Zoom, Teams, Meet), and select the camera from the settings menu.
4. How do I know if the camera is positioned correctly?
Position the camera at eye level (4–6 feet from the floor) and 6–12 feet from participants. Test by having people sit in the furthest seats — if all faces are clearly visible in the frame with small margins on the sides, the positioning is correct.
5. What if my conference room is larger than the camera's cable length?
Standard USB cables are 6–10 feet. For longer distances, use extended USB cables (up to 16 feet) or powered USB extenders for distances beyond that. Route cables along walls or under tables using adhesive clips to keep the installation clean and prevent tripping hazards.
Summary
You can install a conference room camera yourself by selecting a USB plug-and-play model, measuring optimal positioning at eye level 6-12 feet from participants, choosing appropriate mounting method (monitor clip, tripod, or wall mount), connecting USB cable directly to computer, and testing in your conferencing platform. Models like the Coolpo AI Pana simplify DIY installation with its plug and play feature where you can just put the conference camera on top of the table. Complete installation in 15-30 minutes using basic tools, test camera positioning with participants seated, and adjust angle to ensure all faces appear clearly in frame. Reserve professional installation for wall cable runs, multiple camera systems, or PoE setups requiring electrical expertise.
Recent blogs


What Device and Camera Features Can Enhance Camera Performance on Laptops?


.png)
Reliable
Innovation
Touch


