
Why My Conference Camera Won't Turn On?
Most conference camera problems come down to three causes: a loose or wrong USB connection, a software or permissions conflict, or an actual hardware fault. Start with the USB port and power check, then permissions, then drivers. If you're troubleshooting the same camera repeatedly, it's often cheaper in the long run to upgrade to a more reliable all-in-one system than to keep fixing an aging webcam.
When your conference camera won't turn on, check these three things first: (1) USB connection, (2) power status, and (3) permissions for access. These fixes resolve most camera issues within 5 minutes.
Why Conference Cameras Stop Working
.jpg)
Camera failures generally fall into three categories, roughly in the order most people run into them:
1. Connection Problems
- Loose or damaged USB cables
- Wrong USB port selection
- Insufficient power supply
- Hub compatibility issues
2. Software Conflicts
- Another app using the camera
- Missing permissions
- Outdated drivers
- Platform compatibility errors
3. Hardware Failures
- Physical camera damage
- Power button not activated
- Lens cover left on
- Device malfunction
6 Quick Fixes (Try These First)
Getting stuck on a dead camera right before a meeting costs real time, these fixes are designed to claw that time back as quickly as possible.
1. Check the USB Connection (2 minutes)
For external cameras, start by unplugging the USB cable completely and inspecting it for any visible damage or bent pins. Reconnect the device using a different USB port, preferably a USB 3.0 port (usually marked in blue), and avoid using USB hubs by connecting the camera directly to your computer instead. This often resolves the issue because loose connections are one of the most common causes of camera failures, and USB 3.0 ports provide better power delivery compared to older USB 2.0 ports.
2. Verify Camera Power (1 minute)
Check whether your camera is actually turned on by looking for LED indicator lights, which are usually blue or green when the device is active. If the camera has a power button, make sure to press it. For USB-powered cameras, confirm that the port provides enough power, and if the device has a separate power input, try plugging it into a wall adapter. A common mistake is forgetting that some standalone cameras have their own power buttons.
3. Close Conflicting Applications (2 minutes)
Only one app can use your camera at a time.
Windows:
- Press Ctrl + Shift + Esc to open Task Manager
- Look for apps like Zoom, Teams, Skype, Chrome running
- End tasks for any video apps you're not using
- Restart your meeting software
Mac:
- Press Cmd + Option + Esc for Force Quit
- Close unnecessary apps
- Restart your video platform
4. Check Camera Permissions (3 minutes)
Windows 10/11:
- Go to Settings > Privacy & Security > Camera
- Turn ON "Camera access"
- Turn ON "Let apps access your camera"
- Scroll down and enable for your specific app (Zoom, Teams, etc.)
- Turn ON "Let desktop apps access your camera"
Mac:
- Open System Preferences > Security & Privacy
- Click Camera tab
- Check boxes next to Zoom, Teams, or your video app
- Restart the application
- Grant permission when prompted
Browser-based calls (Meet, Whereby):
- Click the lock icon in address bar
- Check camera permissions are set to "Allow"
- Refresh the page
- Click "Allow" when prompted again
5. Select the Correct Camera (1 minute)
If you have multiple cameras (laptop + external):
- In Zoom: Settings > Video > Camera dropdown
- In Teams: Settings > Devices > Camera dropdown
- In Meet: Settings (gear icon) > Video > Camera selection
Test immediately: Most platforms have a preview window showing what the camera sees. If you see yourself, it's working.
6. Update or Reinstall Drivers (5 minutes)
Windows:
- Right-click Start > Device Manager
- Expand "Cameras" or "Imaging Devices"
- Right-click your camera
- Select "Update driver"
- Choose "Search automatically for drivers"
If update fails, try "Uninstall device" then restart PC.
Mac:
- Update macOS to latest version (System Preferences > Software Update)
- Restart your Mac
- Test camera in FaceTime or Photo Booth
Advanced Troubleshooting
Restart Everything (10 minutes total)
The nuclear option that works surprisingly often:
- Close all applications
- Unplug the camera
- Restart your computer completely
- Plug camera back in after restart
- Wait 30 seconds for drivers to load
- Test in your video software
Test in Different Software
Verify if it's a camera or software problem:
- Windows: Open "Camera" app (search in Start menu)
- Mac: Open Photo Booth or FaceTime
- Browser: Visit webcamtests.com
If camera works in test but not in Zoom/Teams/Meet, the problem is software-specific. Reinstall that application. Keep in mind this only confirms the camera is powering on and streaming, if the picture looks fine in testing but your actual meetings still look grainy or laggy, that's usually a separate issue worth troubleshooting on its own, covered in how to fix video quality problems specifically on Google Meet or Zoom.
Check for Physical Obstructions
Often overlooked issues:
- Remove lens privacy cover/slider
- Check for protective film still on lens
- Clean lens with microfiber cloth
- Ensure camera isn't blocked by objects
When to Consider a Replacement
If your camera still isn't functioning after completing all troubleshooting steps, it may be time to evaluate whether repair or replacement is the more practical option. It's worth checking what's actually worth prioritizing in a modern conference room setup.
Entry-Level Webcams ($50–$100)
These devices typically have a lifespan of 2–3 years, with common performance issues appearing after 18–24 months of regular use. In many cases, the cost and time required for repair exceed the value of the device, making replacement the more economical solution.
Professional Conference Cameras ($1,000 and Above)
Most professional-grade conference cameras are priced around $1,000 or more and are designed to last 5–7 years with proper care. Given their higher investment, thorough troubleshooting is recommended before considering replacement. If the device is still under warranty, contacting the manufacturer's support team is strongly advised.
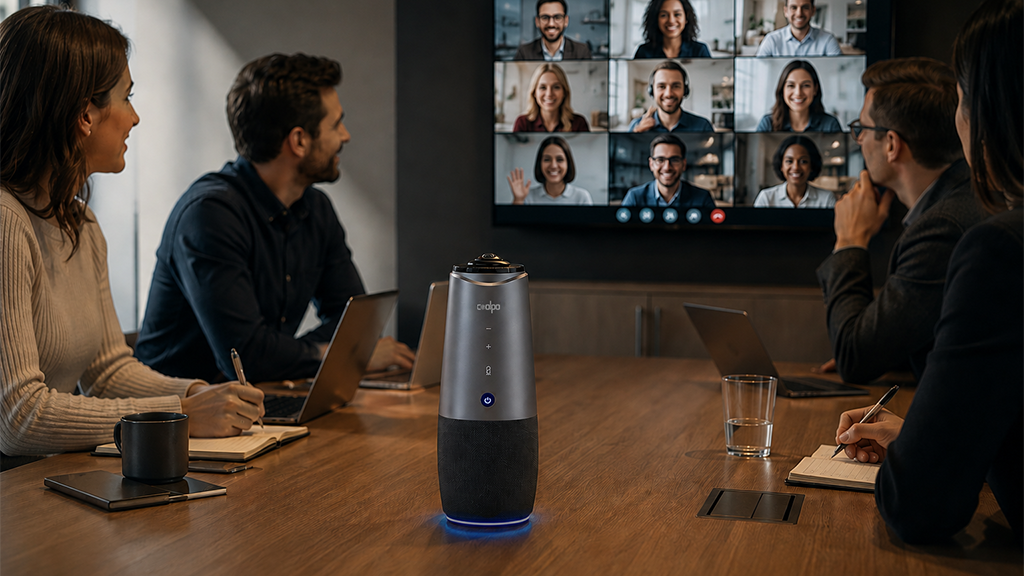
That said, investing in a professional solution doesn't always require spending $1,000+. Options like the Coolpo Pana provide professional-grade performance at a more accessible price point ($598.98). It's a cost-effective alternative for businesses that want reliability without the premium price tag. Camera problems and choppy or blurry call quality often get lumped together, but they're not always the same fix, if recordings specifically look off even after your camera is confirmed working, these targeted fixes for Zoom recording quality.
Conclusion
Most conference camera issues resolve in under 5 minutes by checking USB connections, verifying permissions, and closing conflicting apps. If you're repeatedly troubleshooting the same camera, consider upgrading to a professional all-in-one system like the Coolpo AI Pana ($598.98), which eliminates common failure points through simpler plug-and-play design. Always try a different USB port first, ensure only one app accesses your camera at a time, and when in doubt, restart everything.
Better meetings start with better gear. See how Coolpo AI Huddle Pana conferencing keeps remote and in-room teams perfectly clear.
1. Why does my conference camera work in one app but not another?
This indicates a software-specific issue rather than hardware failure. The camera is functioning, but permissions or compatibility settings need adjustment for the specific app. Go to that app's settings and verify camera access permissions are enabled.
2. How do I know if my camera is broken or just disconnected?
Test the camera in your computer's native camera app (Camera app on Windows, Photo Booth on Mac). If it works there but not in your meeting software, it's a software issue. If it doesn't work anywhere, check physical connections and try a different USB port.
3. Can I use my conference camera while another app is running?
No. Only one application can access your camera at a time. If Zoom is using your camera, Teams cannot access it simultaneously. Close all video apps except the one you're actively using for your meeting.
4. Why does my camera stop working after a Windows or Mac update?
Operating system updates sometimes reset privacy permissions or driver compatibility. After an update, revisit your Privacy & Security settings to re-enable camera access for your video conferencing apps.
5. How often should I clean my conference camera lens?
Clean your camera lens weekly with a microfiber cloth if used daily, or before important meetings if used less frequently. Dust, fingerprints, and smudges significantly degrade video quality and can cause autofocus issues.
Recent blogs




Reliable
Innovation
Touch


